Spring Batch 5 는 이전과 많은 변화가 있다.
새롭게 생성하기 전이나 마이그레이션하기 전에 어떤게 변했는지 참고해본다.
https://github.com/spring-projects/spring-batch/wiki/Spring-Batch-5.0-Migration-Guide
Spring Batch 5.0 Migration Guide
Spring Batch is a framework for writing batch applications using Java and Spring - spring-projects/spring-batch
github.com
💡 이전에는 @EnableBatchProcessing 어노테이션을 통해서 스프링 배치의 스프링 부트 자동설정을 활성화할 수 있었습니다. 하지만 이제는 스프링 부트의 자동설정을 사용하기 위해서는 삭제해야 합니다. @EnableBatchProcessing 명시하는 방법 또는 DefaultBatchConfiguration 을 상속하여 활성화되는 빈은 이제 스프링 부트의 자동설정을 밀어내고(back-off), 애플리케이션의 설정을 커스텀하는 용도로 사용됩니다.
따라서 @EnableBatchProcessing 이나 DefaultBatchConfigration 을 사용하면 spring.batch.jdbc.initialize-schema 등의 기본 설정이 동작하지 않습니다. 또한 부트를 실행시킬 때 Job 이 자동으로 실행되지 않으므로 Runner 의 구현이 필요합니다.
1. 프로젝트 생성
- 현 시점 (24.04.19) 기준으로 Spring 최신버전 사용
- dependencies 는 아래 참고 ( Spring batch 필수 , 나머지는 선택 )
plugins {
    id 'java'
    id 'org.springframework.boot' version '3.1.11'
    id 'io.spring.dependency-management' version '1.1.4'
}

group = 'com.example'
version = '0.0.1-SNAPSHOT'

java {
    sourceCompatibility = '17'
}

configurations {
    compileOnly {
        extendsFrom annotationProcessor
    }
}

repositories {
    mavenCentral()
}

dependencies {
    implementation 'org.springframework.boot:spring-boot-starter-batch'
    implementation 'org.springframework.boot:spring-boot-starter-data-jpa'
    implementation 'org.springframework.boot:spring-boot-starter-jdbc'
    compileOnly 'org.projectlombok:lombok'
    runtimeOnly 'com.mysql:mysql-connector-j'
    annotationProcessor 'org.springframework.boot:spring-boot-configuration-processor'
    annotationProcessor 'org.projectlombok:lombok'
    testImplementation 'org.springframework.boot:spring-boot-starter-test'
    testImplementation 'org.springframework.batch:spring-batch-test'
}

tasks.named('bootBuildImage') {
    builder = 'paketobuildpacks/builder-jammy-base:latest'
}

tasks.named('test') {
    useJUnitPlatform()
}
2. 데이터베이스 설정 ( Docker MySQL 사용 )
- docker-compose.yml
version: '3'

services:
  mysql:
    container_name: spring_batch
    image: ubuntu/mysql:edge
    ports:
      - 3306:3306
    environment:
      - MYSQL_DATABASE=spring_batch
      - MYSQL_USER=abcd
      - MYSQL_PASSWORD=1234
      - MYSQL_ROOT_PASSWORD=1234
      - TZ=UTC
    volumes:
      - ./mysql/init:/docker-entrypoint-initdb.d
docker 띄우기
- docker-compse up 명령어 사용
3. application.yml 설정
- name: ${job.name:NONE} 은 프로그램 변수로 넣어줄 수 있게 한다.
spring:
  config:
    activate:
      on-profile: local
  batch:
    job:
      name: ${job.name:NONE}
    jdbc:
      initialize-schema: always
  datasource:
    url: jdbc:mysql://localhost:3306/spring_batch?useUnicode=yes&characterEncoding=UTF-8&rewriteBatchedStatements=true
    driver-class-name: com.mysql.cj.jdbc.Driver
    username: abcd
    password: 1234
    hikari:
      maximum-pool-size: 10
      max-lifetime: 30000
      connection-timeout: 3000

  jpa:
    show-sql: true
4. Job생성
- 가장 단순하게 print 만 찍어보기
@RequiredArgsConstructor
@Configuration
public class MyJobConfig {

    @Bean
    public Job myJob(JobRepository jobRepository, Step step) {
        return new JobBuilder("myJob1", jobRepository)
                .start(step)
                .build();
    }

    @Bean
    public Step myStep(JobRepository jobRepository, Tasklet tasklet, PlatformTransactionManager transactionManager) {

        return new StepBuilder("myStep1",jobRepository)
                .tasklet(tasklet, transactionManager)
                .build();
    }

    @Bean
    public Tasklet myTasklet() {
        return (contribution, chunkContext) -> {
            System.out.println("\n *********** my first spring batch ***********");
            return RepeatStatus.FINISHED;
        };
    }
}
5. 환경변수 설정
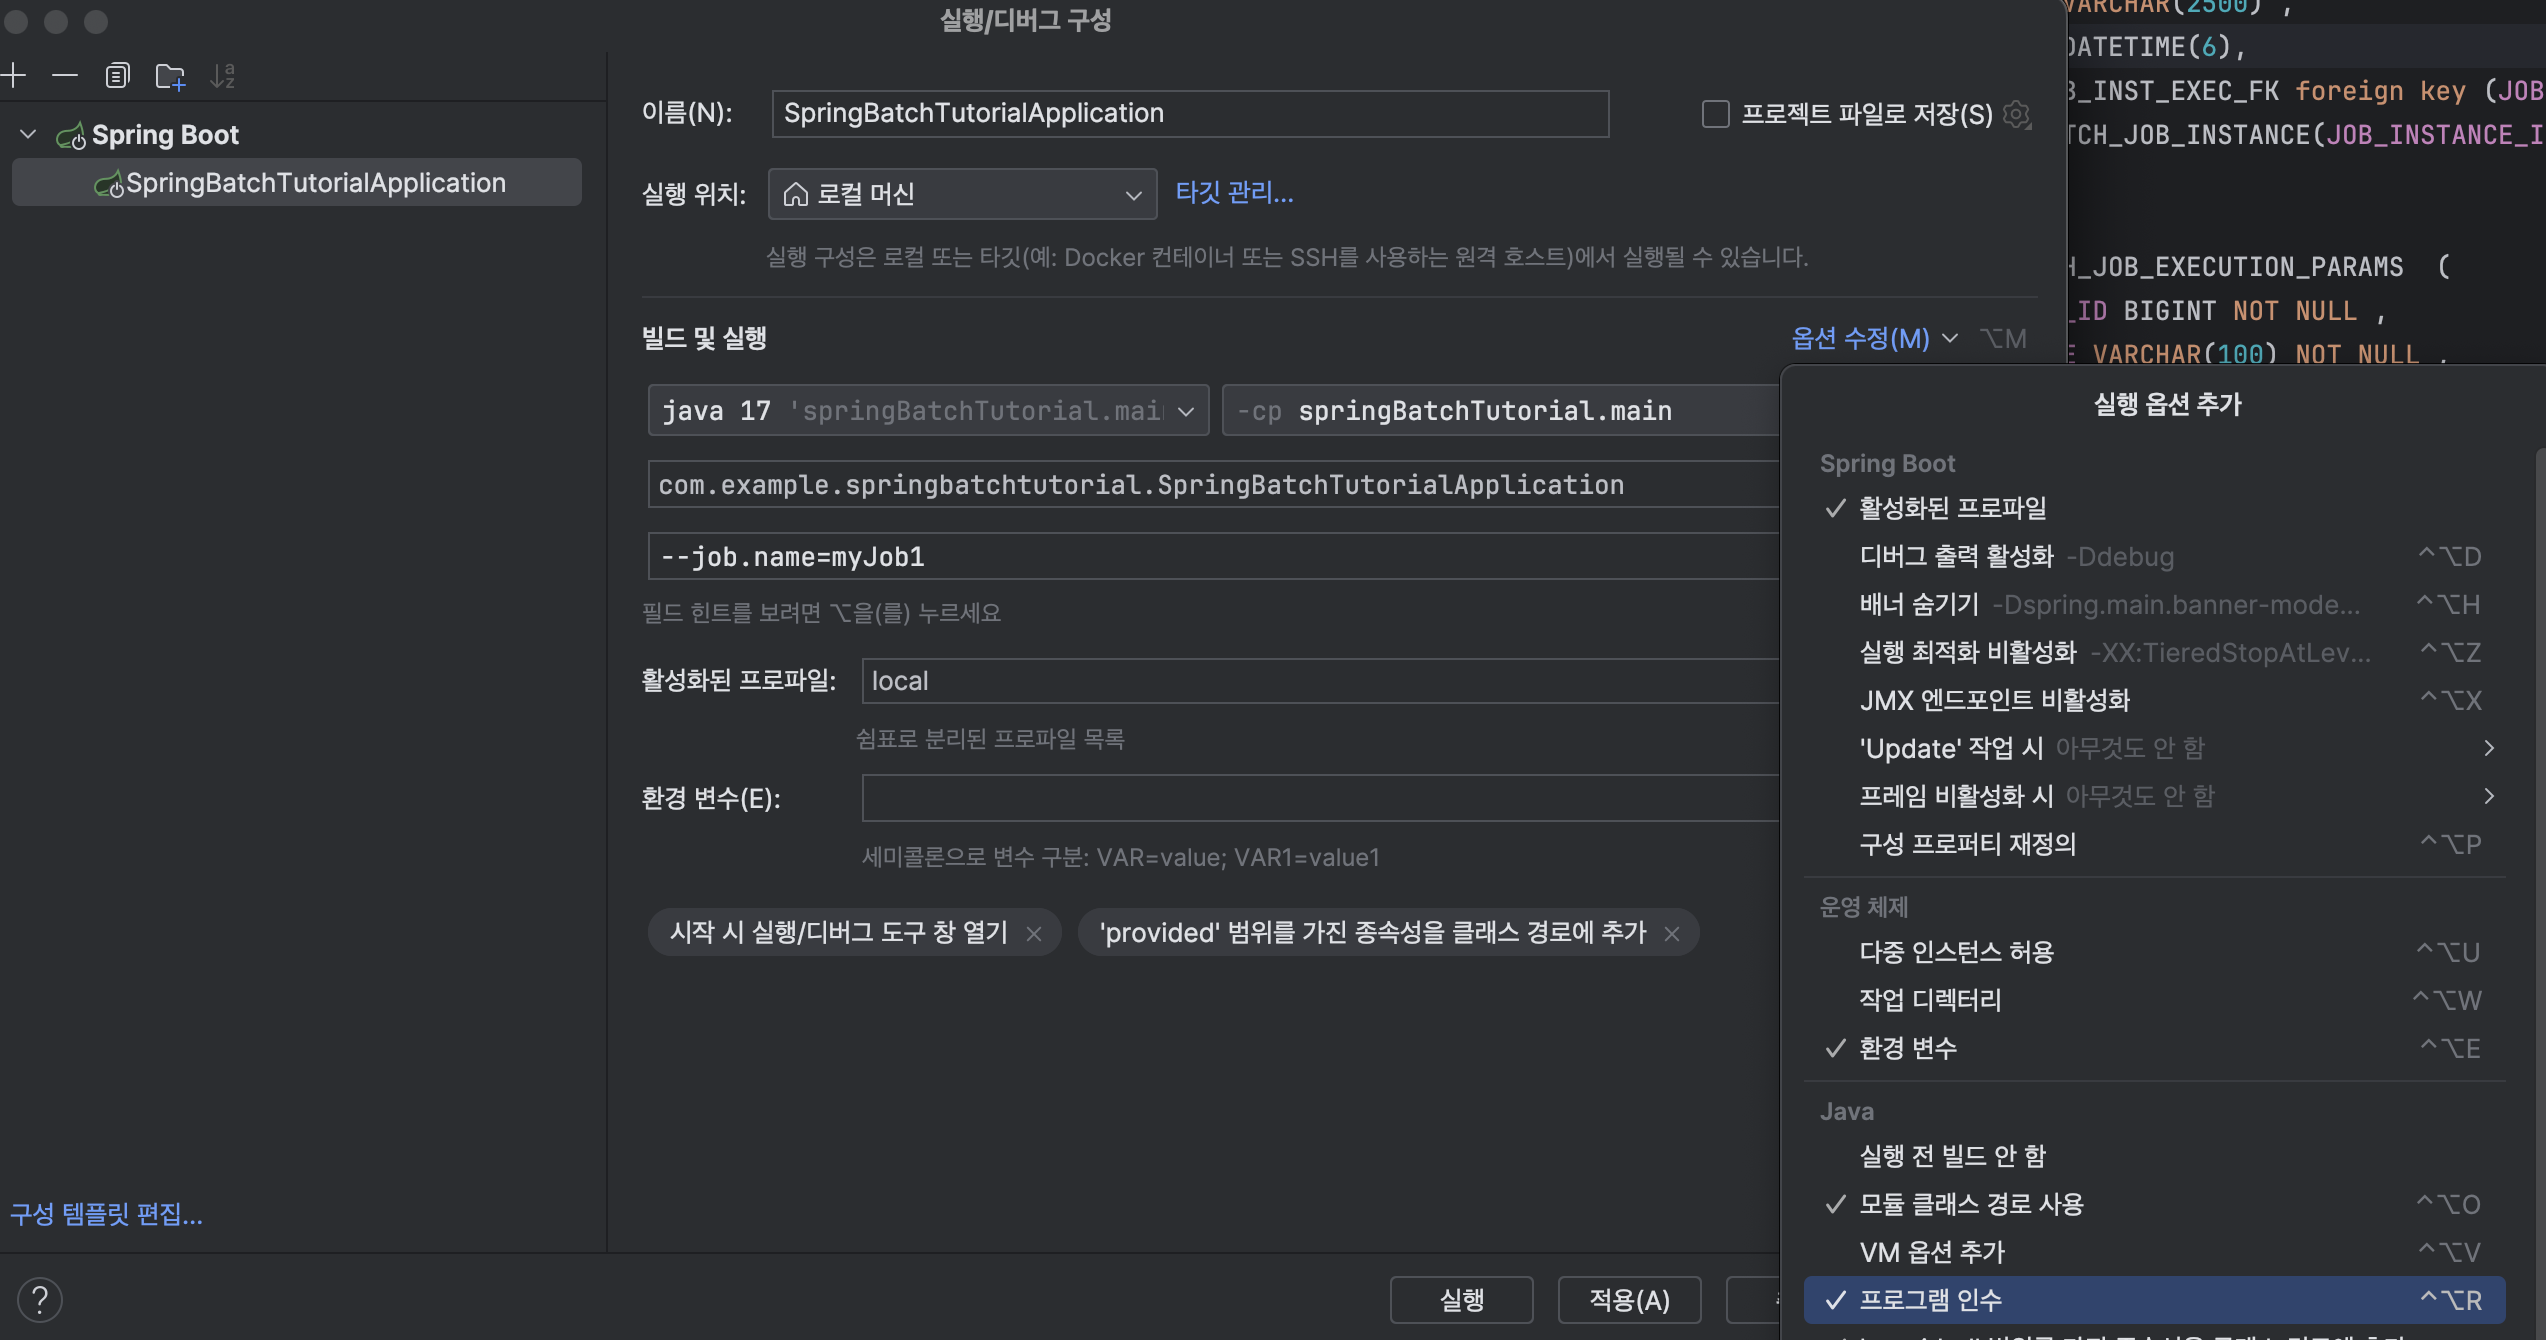
- 프로그램 인수 추가해서 --job.name=myJob1 로 설정

6. DB 에 batch 테이블 생성하기
- 원래 자동으로 생성해준다고 하는데, 버전이 올라가면서 생성이 안되는지 직접 생성한다.
- 스크립트 위치 ( 프로젝트 - 외부 라이브러리에서 batch-core 검색
- 자신에게 맞는 sql 을 찾아서 스크립트를 복사해 직접 생성해주면 된다.

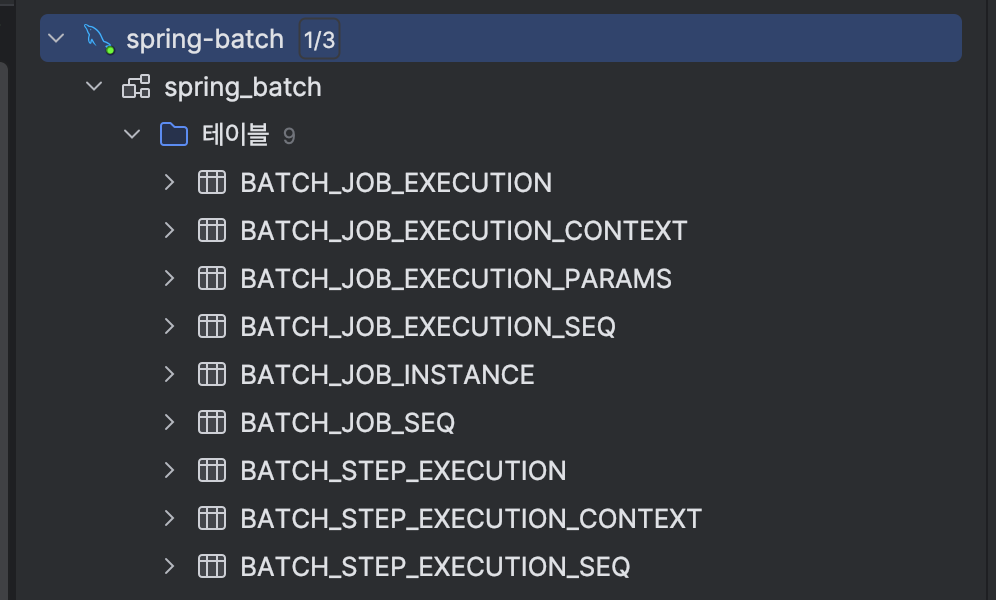
생성 완료하면 아래와 같이 테이블이 생성

7. 잘 찍히는지 확인
- 한번 더 실행하면 해당 Job 은 실행되지 않는다.
- 변수를 변경해주고 다시 시작해야 한다.

8. batch 테이블에 잘 insert 되었는지 확인
- 실행한 데이터 확인


'Spring > Batch' 카테고리의 다른 글
| Chunk Size and Parallel Spring Batch (0) | 2024.04.22 |
|---|---|
| Spring Batch 5.x DB 사용하기 (1) | 2024.04.20 |
| 스프링 배치 (Spring Batch)로 Hello World 를 출력 (0) | 2023.01.12 |


댓글